|
Build Your Own Raspberry Pi Vivarium Controller ** An archive/homage of the original |

|

|
Control & monitor from anywhere The Raspberry Pi Vivarium Controller can be accessed anywhere you have an Internet connection and a web browser. You may also keep it private on your local network. |
|
A perfect starting point The Raspberry Pi Vivarium Controller can be used to monitor more than just vivariums. It's perfect for greenhouses and any application that requires automated environmental control & monitoring. |
|
|
Raspberry Pi? The Raspberry Pi is a $25 - $35 credit card sized single board computer that runs on Linux, an Open Source computer operating system. |

|

|
Easy to customize With Raspberry Pi Vivarium Controller it's easy to build exactly what you need. Rather than having several random components each doing different jobs, you can now have one system to control everythin |
|
NEW: BEFORE YOU START! n now have one system to control everythin |
|
|
Get the free Web-App
This version of code uses MYSQL call statements which are no longer supported in PHP7. To get this software to work you must download an older version of NOOBS (Jessie) which still supports PHP5. Also, this code will NOT work on a Pi 3B+ without several modifications. Excited yet? Start exploring and experience RasPiViv 
|

|
|
BUILD What You'll Need To get started building the Raspberry Pi Vivarium Controller you'll need a Raspberry Pi running the latest Raspbian OS. |
|||
 Raspberry Pi The Raspberry Pi B+ is used for this project |
 Micro SD Card You'll need an 8Gb minimum micro SD card |
 Micro USB PS The Raspberry Pi standard power supply |
 HDMI Cable Temporarily, for initial OS install and configuration |
 Network Cable This can be switched later for WIFI |
 USB Keyboard Mouse is optional. Only needed for initial install |
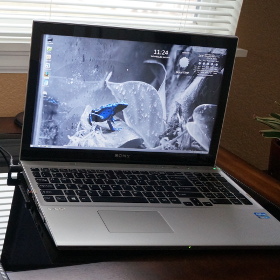
 Computer Used to install Raspian files on SD card and SSH access |
 HDMI Display Any monitor or display with an HDMI input will work |
|
Getting Started with the Raspberry Pi We're going to be installing Rasbian as a headless LAMP server. The server will be administered through an SSH connection from another computer. |
|||
|
STEP 1 First download the latest NOOBS installer package from Raspberry Pi 
|
|||
|
STEP 2 While download, insert the SD card into your computer's SD card reader 
|
|||
|
STEP 3 Format your SD card to FAT 
|
|||
|
STEP 4 After download NOOBS, unzip the file, open it and then copy all the folders and files straight to the root of the formated SD card. 
|
|||
|
STEP 5 Unmount or safely remove the SD card from your computer and insert it into the Raspberry Pi. 
|
|||
|
STEP 6 Plug the HDMI monitor, USB keyboard and connect the Raspberry Pi to your network router with the CAT5e cable 
|
|||
|
STEP 7 Power up the Raspberry Pi by plugging in the micro USB power supply 
|
|||
|
STEP 8 If everything was done correctly you will see the Install Screen 
|
|||
|
STEP 9 Select "Install Rasbian" and press enter. Navigation can be done with only a keyboard or mouse. 
|
|||
|
STEP 10 When the install has finished, open a terminal and type sudo raspi-config Set the time and date and boot to command line, change the "pi" password and enable SSH Server. Select Finish and reboot 
|
|||
|
STEP 11 After booting up you will see the command prompt, take note of your Raspberry Pi's IP address login using "pi" and the default password "raspberry" or the password you choose earlier type sudo halt -p and press Enter in the command line to shutdown your Raspberry Pi 
|
|||
|
STEP 12 You may now disconnect the HDMI, remove the USB keyboard and/or mouse and login to your headless Raspberry Pi using SSH. 
|
|||
|
CONGRATULATIONS! You now have a Raspberry Pi with an operating system! Now we need to get the required software installed on your Raspberry Pi so we can start putting it to good use! Next we will install and configure the LAMP server and finish setup> |
|||
|
BUILD 2 Setting Up the Raspberry Pi Part 2 Now that we have a Raspberry Pi running Raspian we're almost finished! Just a few more steps to finish. |
|||
|
STEP 1 With your Raspberry Pi connected to your network router and booted up you may now use SSH to login to finsih setup 
|
|||
|
STEP 2 Open a terminal on a local computer and enter ssh pi@your-ip-address use the default password or the password you chose earlier 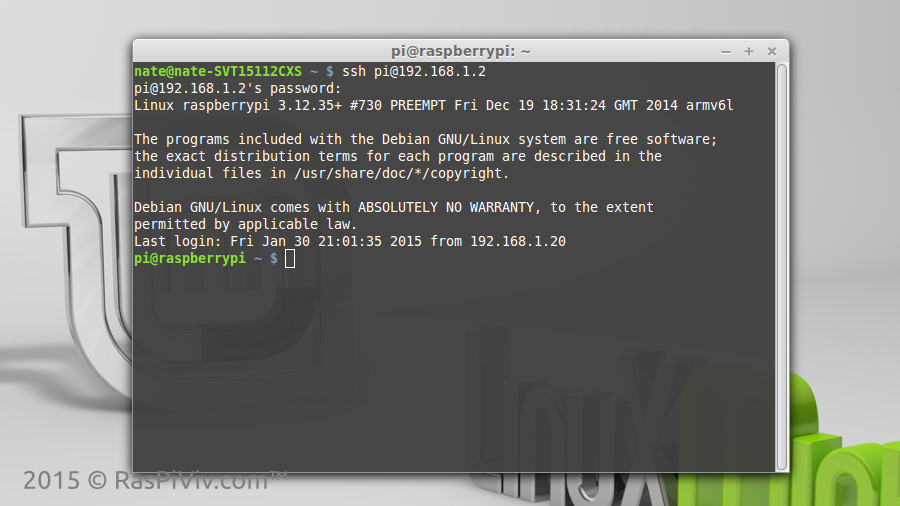
|
|||
|
STEP 3 Upgrade your operating system by entering sudo apt-get update && sudo apt-get dist-upgrade When asked to install updates type y press enter to confirm. 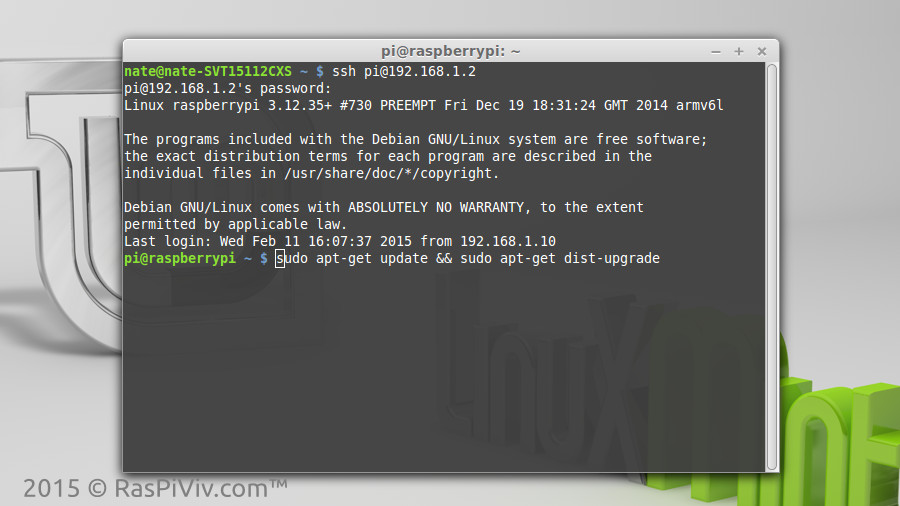
|
|||
|
STEP 4 Install LAMP by entering sudo apt-get install apache2 mysql-server php5-mysql build-essential git-core When asked to install, type y press enter to confirm. 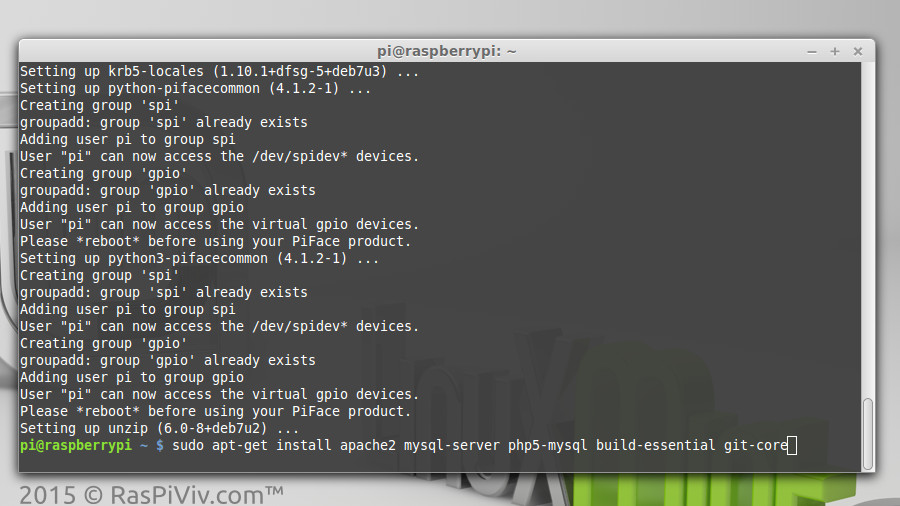
|
|||
|
STEP 5 You will be required to create a MySQL password for the root user. 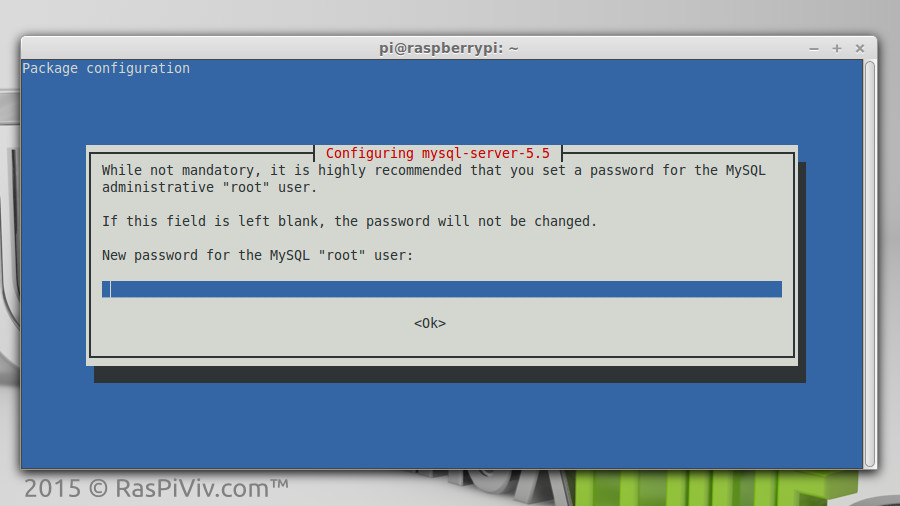
|
|||
|
STEP 6 You may now vist your website at your Raspberry Pi's local IP address 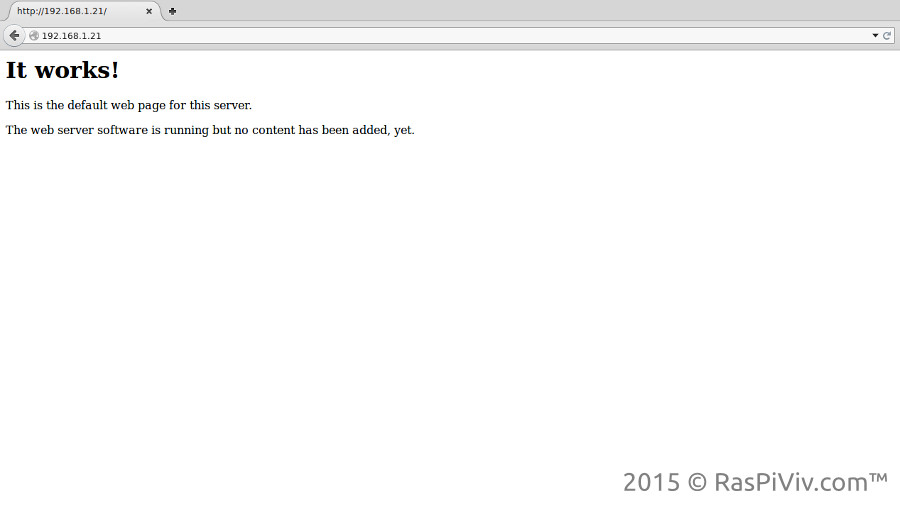
|
|||
|
STEP 7 Install PHP5 module for Apache2 sudo apt-get install libapache2-mod-php5 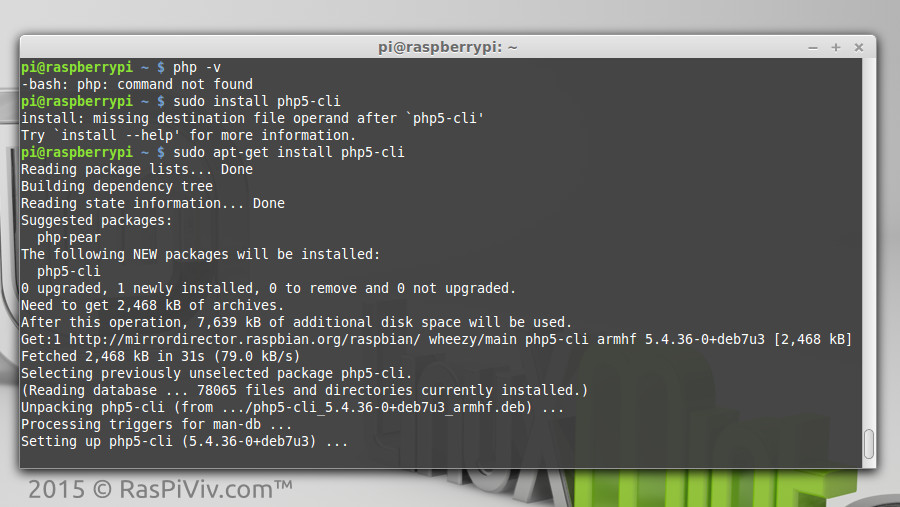
|
|||
|
STEP 8 Install Wiring Pi git clone git://git.drogon.net/wiringPi cd wiringPi ./build 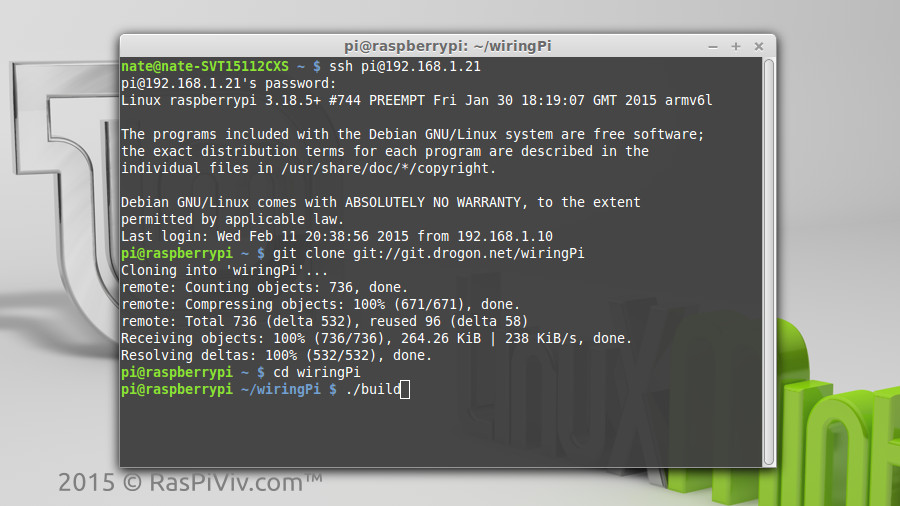
|
|||
|
STEP 9 Install the DHT22 Sensor drivers. Type cd ~ to return to your home directory git clone https://github.com/technion/lol_dht22 cd lol_dht22 ./configure sudo make install 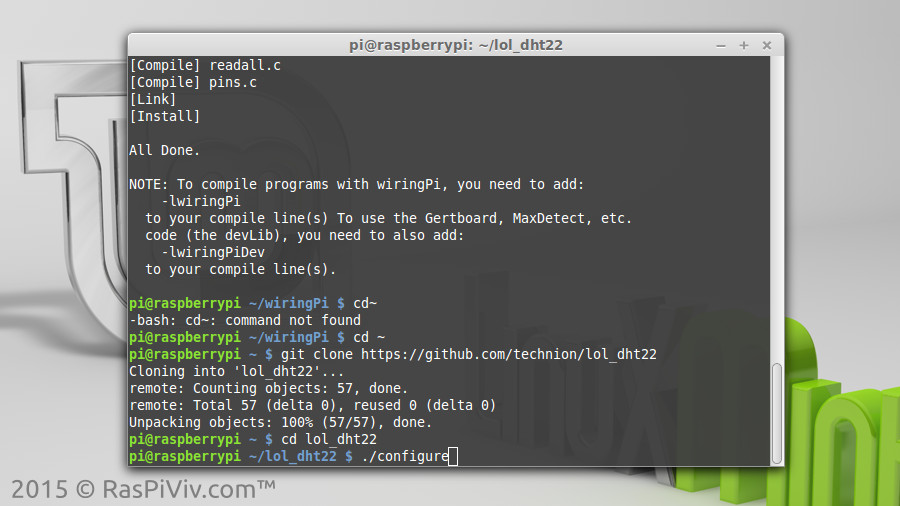
|
|||
|
STEP 10 (OPTIONAL) If you have a USB WI-FI dongle, insert it into one of the USB ports on your Raspberry Pi At the command prompt, type sudo nano /etc/wpa_supplicant/wpa_supplicant.conf and add the following to the bottom of the file Be sure to change the SSID and PSK to match your WI-FI network |
|||
|
network={ ssid="your-wifi-ssid" psk="your-wifi-password" } | |||
|
Press Ctrl+X to save, y to confirm and finally press Enter. Enter sudo reboot 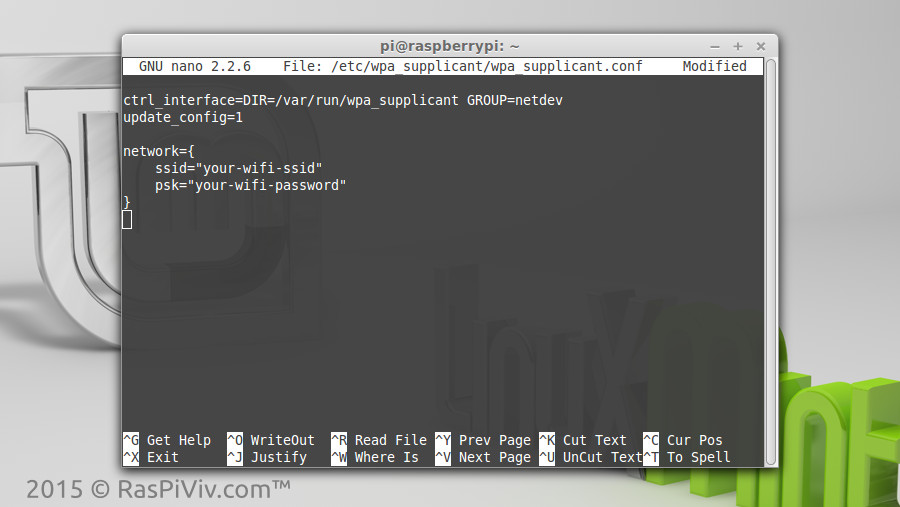
|
|||
|
FINISHED You now have your Raspberry Pi configured and ready to go. In the next section we will install the sensors, database and Raspberry Pi Vivarium controller software. |
|||
|
SENSORS What You'll Need Now that our Raspberry Pi is up and running we can begin installing the DHT22 Temperature and Humidity sensors. |
|||
 Raspberry Pi Loaded with LAMP, WiringPi & DHT22 Drivers |
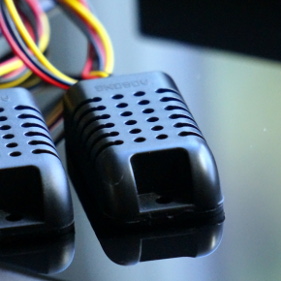 Sensors DHT22 Temperature & Humdity Sensors |
 Jumper Wires Used to connect the sensors to the GPIO |
 Computer For SSH access to your Raspberry Pi |
|
Installing the Temperature & Humidity Sensors The DHT22 Temperature & Humidity Sensors feed readings to the Raspberry Pi where they will be logged in the database. In this setup we will be using 3 DHT22 sensors. One for each vivarium and a sensor to monitor the room where the vivariums are kept. |
|||
|
STEP 1 Wire the sensors to ground (black - pin 6) 3.3v (red - pin 1) and WiringPi pins 7,8,9 (yellow - pins 3,5,7) 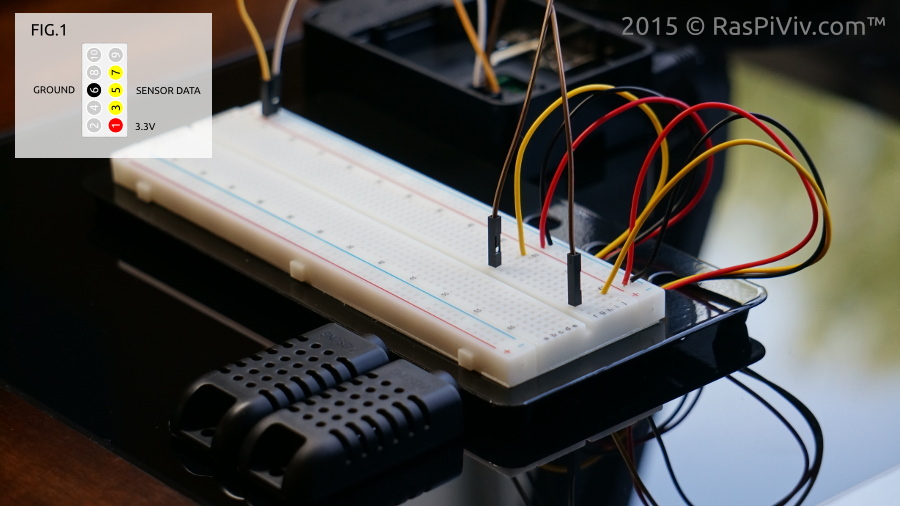 | |||
|
STEP 2 Login to your Raspberry Pi and type: sudo loldht 8 If successful, you should get a reading returned. If not, press Ctrl+C to exit. Check your wiring. Test your other sensors by affixing the pin number to the end of the command. 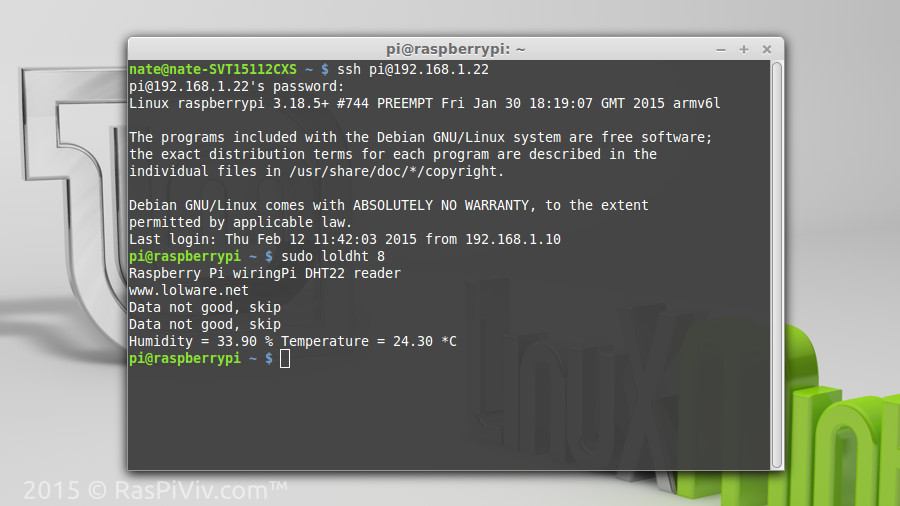 | |||
|
STEP 3 Install the sensor database wget http://www.raspiviv.com/databases/datalogger.sql mysql -u root -p < datalogger.sql Create a new Mysql user mysql -u root -p CREATE USER 'datalogger'@'localhost' IDENTIFIED BY 'datalogger'; GRANT ALL PRIVILEGES ON datalogger . * TO 'datalogger'@'localhost'; 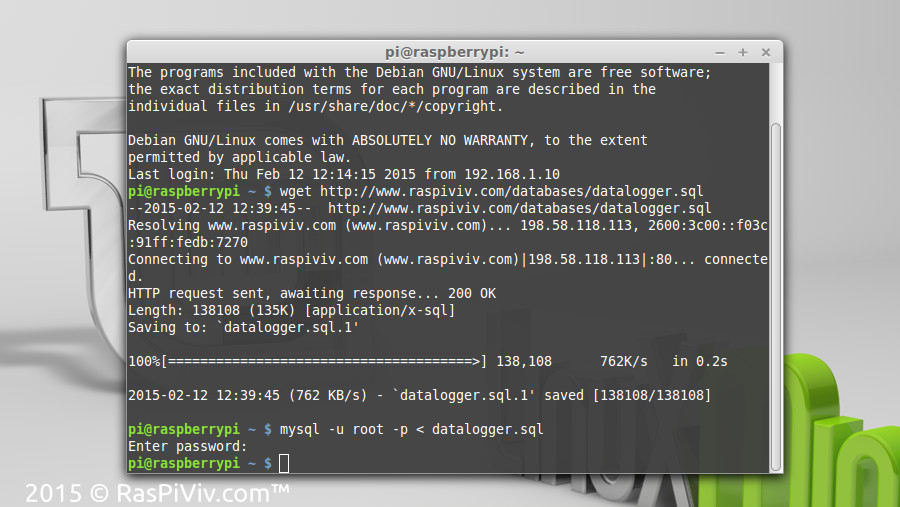 | |||
|
STEP 4 Download the Raspberry Pi Vivarium Controller Installation package and install following the directions in the file Type sudo nano /var/www/html/sensor.php At the end of the file change the sensor values if needed. Press Ctrl+X sve by pressing y and Enter.  | |||
|
STEP 5 Test the sensors by typing sudo php /var/www/html/sensor.php You can now visit your Rasperry Pi Vivarium controller at its IP address in a web browser and see your current sensor readings. 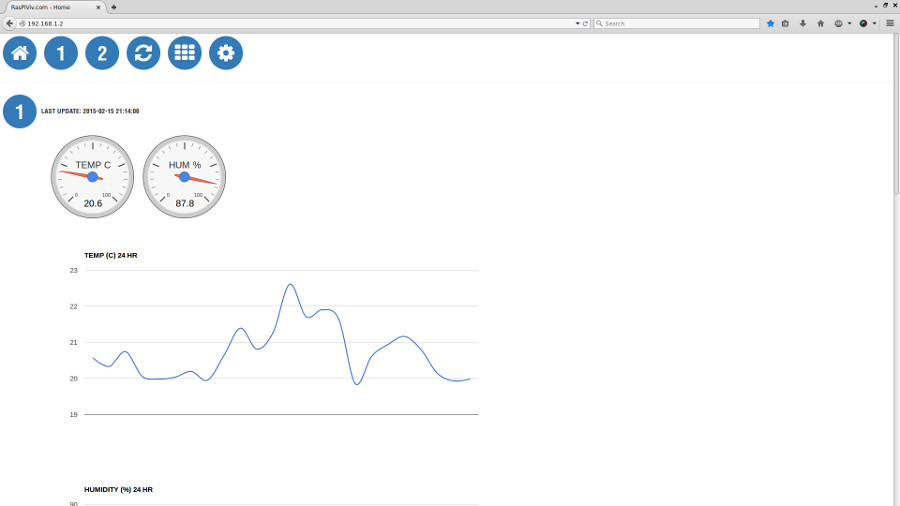 | |||
|
STEP 6 Type sudo crontab -e in the terminal and press ENTER Add the sensor cron job: * * * * * php /var/www.html/sensor.php Add the history cron job: 59 23 * * * php /var/www/html/history.php Press Ctrl+X save by pressing y and Enter 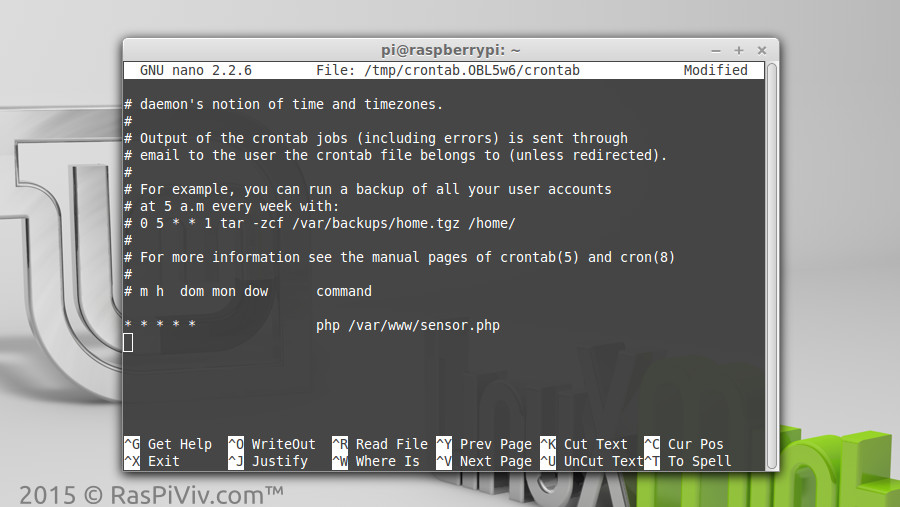 | |||
|
STEP 7 Visit your Raspberry Pi Vivarium Controller home page and confirm that everything works Your sensor data will be updated every minute and the history cron job will delete the day's readings everyday and save the average reading of every hour. | |||
|
FINISHED Now that we have the sensors working we can check on our vivarium condidtions any time Up next we will start working wiht relays to control our lighting and other vivarium components. |
|||
|
RELAYS What You'll Need Gain control over your Vivarium lighting using relays that you can put on a schedule or control manually from your smart phone!. |
|||
 Raspberry Pi Fully loaded with RasPiViv installed |
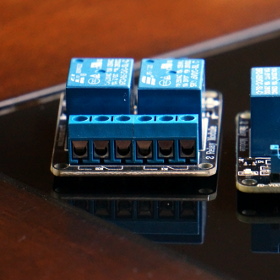 Relay Modules You'll need 4 relays for this project |
 Jumper Wires Used to connect the sensors to the GPIO |
 Computer For SSH access to your Raspberry Pi |
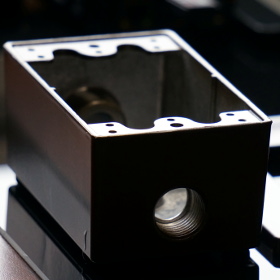 Outlet Boxes With faceplate |
 Power Outlet To power your components |
 Power Cord To bring power to the electrical outlet |
|
|
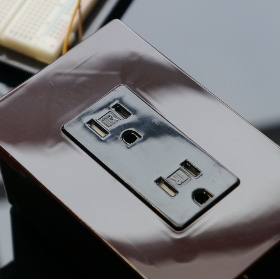
Installing Relays Relays are used to manage lighting, pumps and other vivarium components. You can easily build a outlet box to plug your vivarium components straight into without any modifications. In this build we have a total of 4 relays. two are used to power the lighting of each vivarium and two more to power misting pumps to each vivarium. !! WARNING !! High Voltage! Use extreme caution!! |
|||
|
STEP 1 Wire the relays to ground (black) 5v (red) and WiringPi pins 0,1,2,3 (physical pins 11, 12, 13, 15) 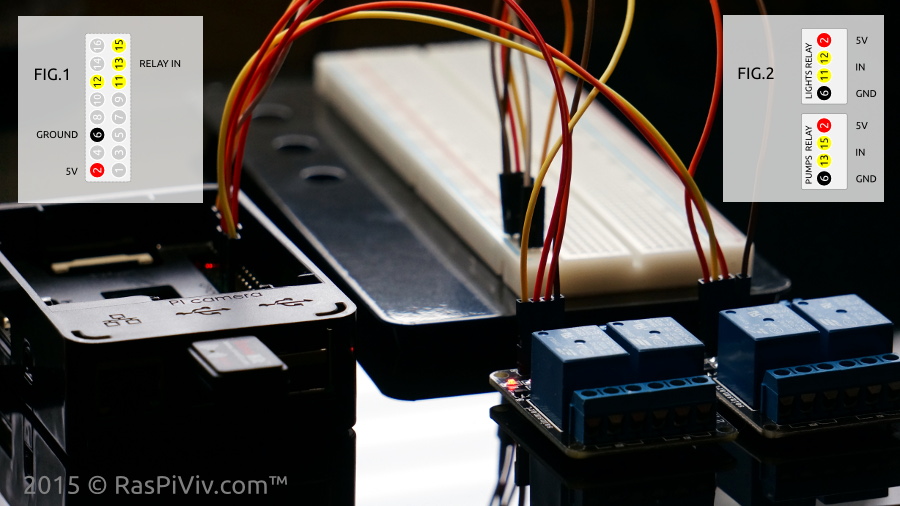 | |||
|
STEP 2 Open the browser and visit your Raspberry Pi Vivarium Controller "Manual Controls" page and test your relays LED indicator lights along with the classic relay click will let you know they're working NOTE: Buttons will show what will happen when clicked, not the current state of the device  | |||
|
STEP 3 Insulate the bottom of your outlet box with thick tape if it is metal Run the power cord through the outlet box opening. 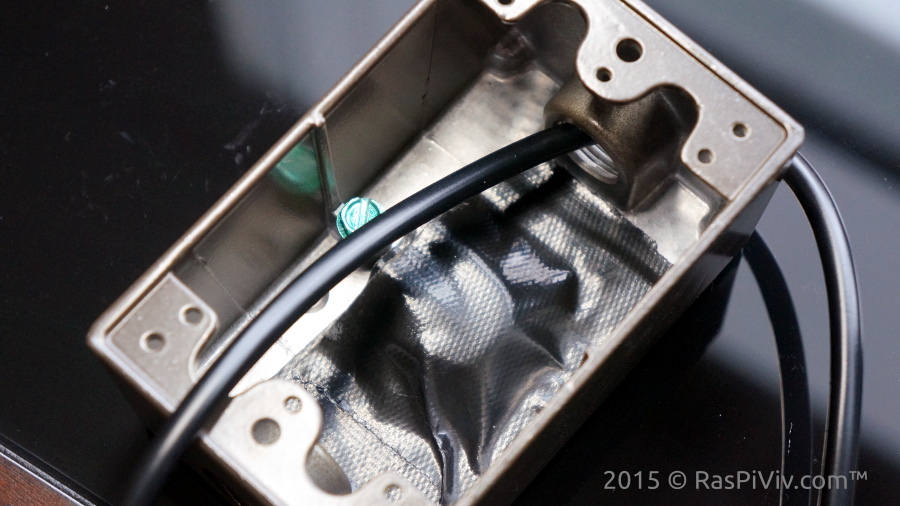 | |||
|
STEP 4 Connect the positive wire of the power cord to the positive screw of the electrical outlet 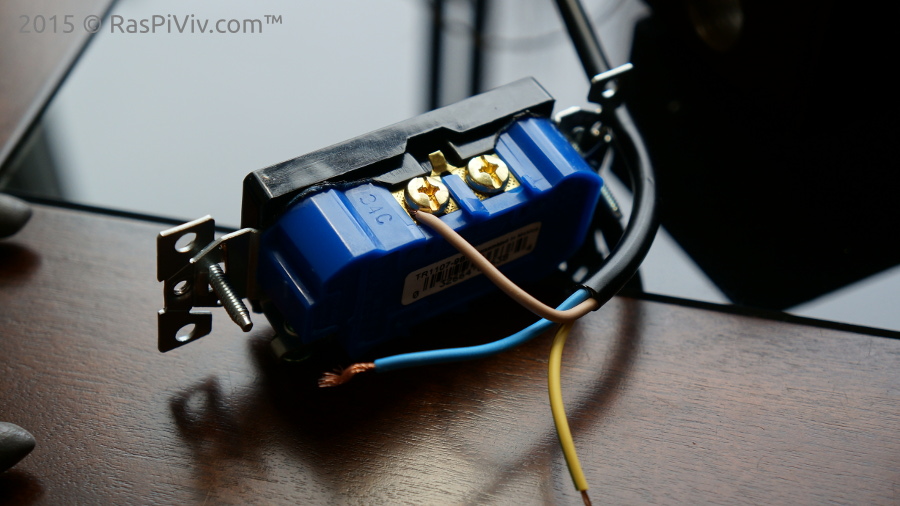 | |||
|
STEP 5 Snap off the tab connecting the negative scrw mounts using a pair of needle nose pliers 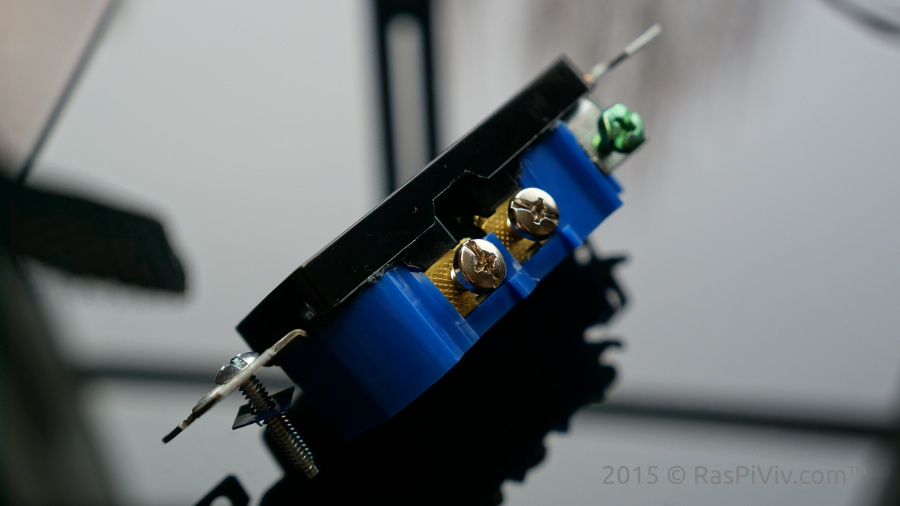 | |||
|
STEP 6 Connect the negative wire of the power cord thorugh the relays using short pieces of wire 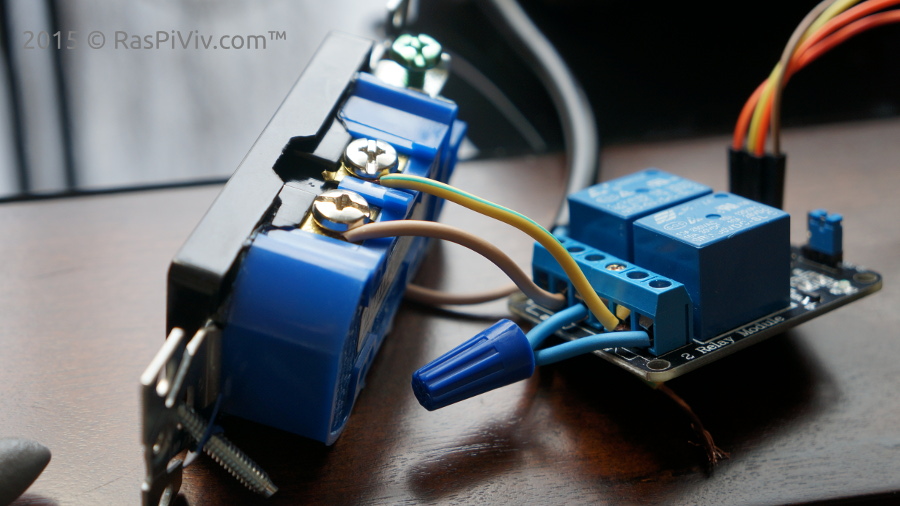 | |||
|
STEP 7 Connect the ground wire of the power cord. 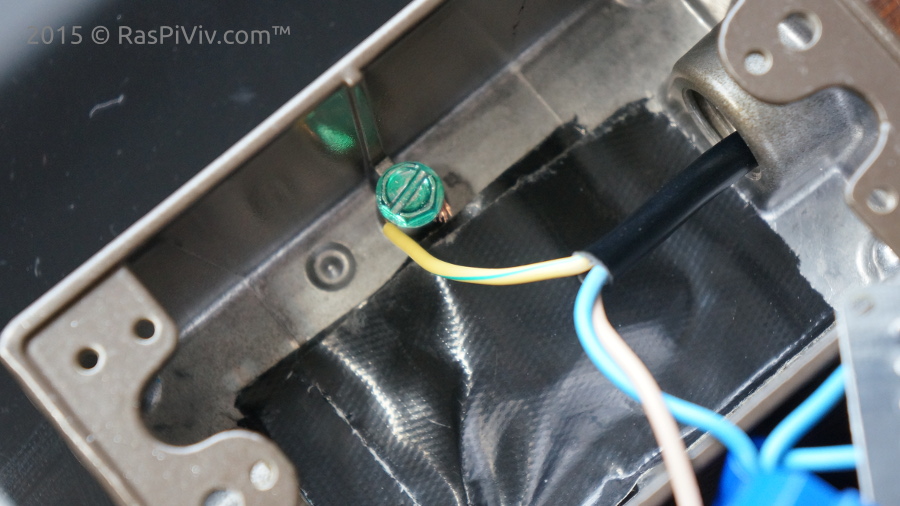 | |||
|
STEP 8 Run the jumper wires through the outlet box and install the relay and electrical outlet. 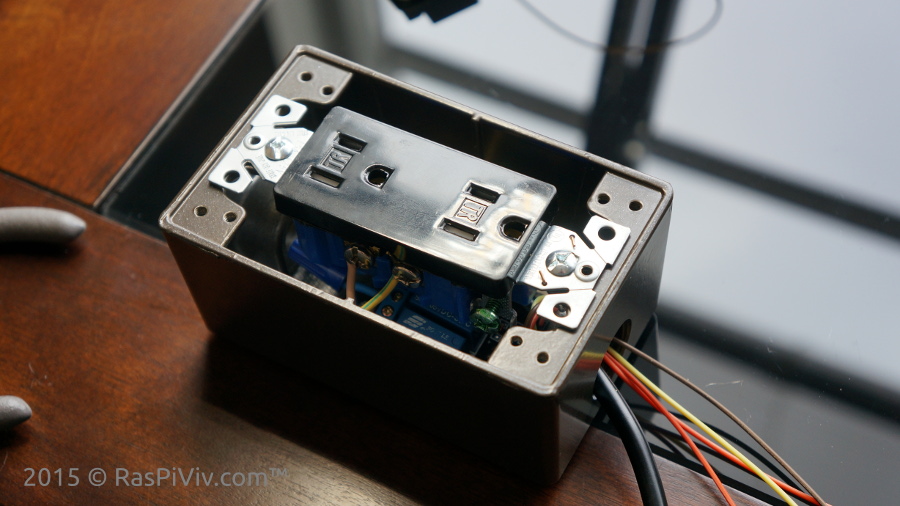 | |||
|
STEP 9 Finish the assembly by installing the faceplat and connect your outlet box to the Raspberry Pi. 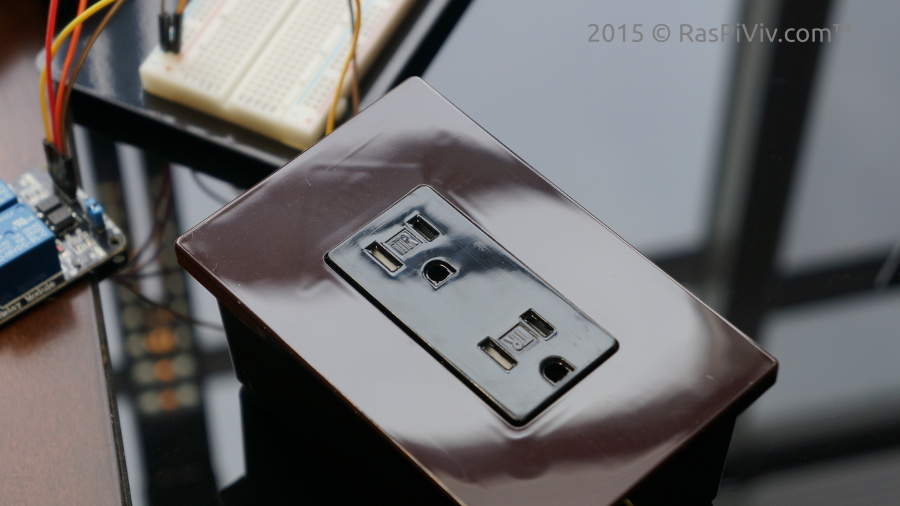 | |||
|
FINISHED Now that we have the relays working we can set a schedule using cron jobs Up next we will create a schedule and install the optional LED moon lights! |
|||
|
LIGHTS What You'll Need |
|||
 Raspberry Pi Fully loaded with RasPiViv installed |
 Relay Power Box Assembled in previous section |
 Jumper Wires Used to connect the sensors to the GPIO |
Computer For SSH access to your Raspberry Pi |
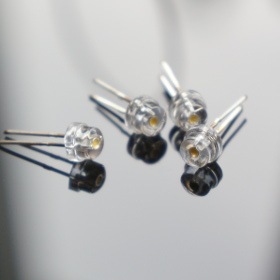 LEDs Used to create Moonlight effect |
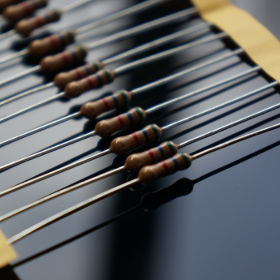 Resistors 10 Ohm 1/2 watt |
||
|
Installing Schedules and LED moonlights Now that we have our relay driven power outlets we can schedule them to turn on and off using a cron job In this build we have two light hoods with LED Moonlights that power on & off automatically during moonlight mode |
|||
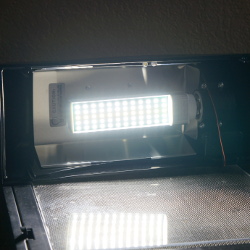 Day Mode Normal Vivarium lighting mode |
 Night Mode LED moonlighting mode |
||
|
STEP 1 Create a cron job to schedule your lighting. In my build the lights pwer on at 8am and off at 8pm * 8 * * * wget -q http://localhost/html/on.php * 20 * * * wget -q http://localhost/html/off.php  | |||
|
STEP 2 Connect the LEDs to a ground pin and positive to GPIO 4 (physical pin 16) All LEDs are wired in parallel with a single resisitor and powered by the GPIO pin 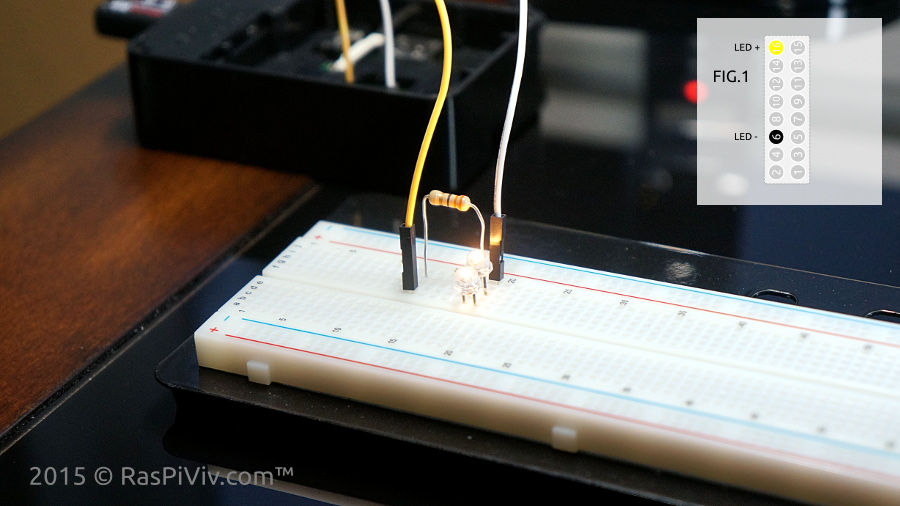 | |||
|
STEP 3 Open a browser and visit your Raspberry Pi Vivarium Controller "Manual Controls" page and test your LEDs NOTE: Buttons will show what will happen when clicked, not the current state of the device. 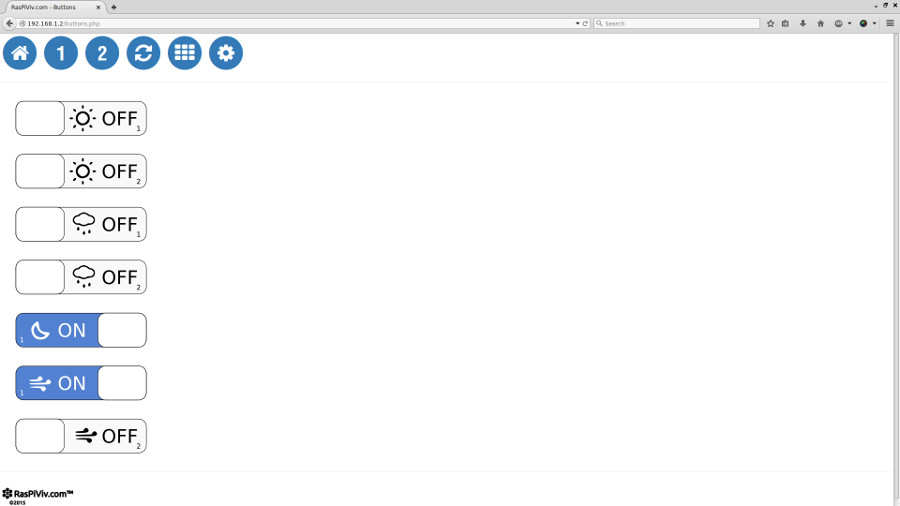 | |||
|
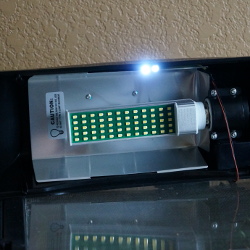
STEP 4 Wire and mount your LED moonlights 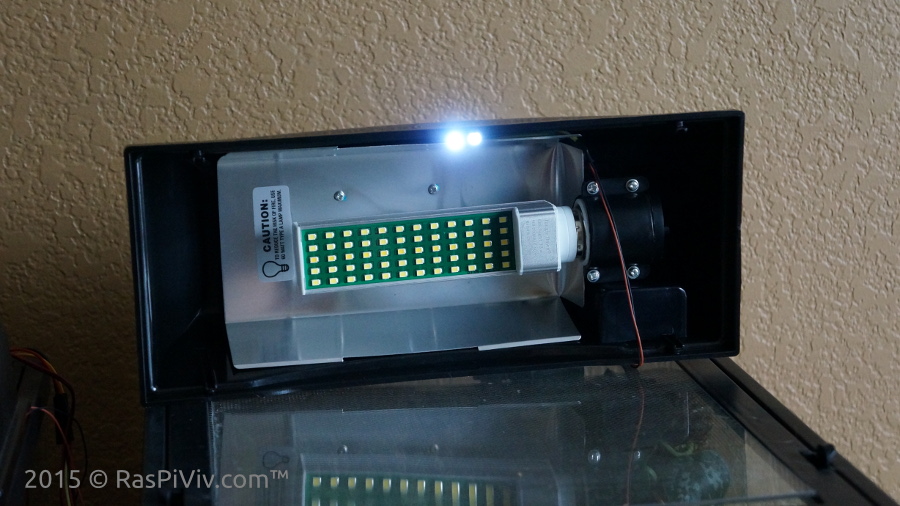 | |||
|
FINISHED Next up, we will install fans and learn how to set humidity |
|||
|
FANS What You'll Need |
|||
 Raspberry Pi Fully loaded with RasPiViv installed |
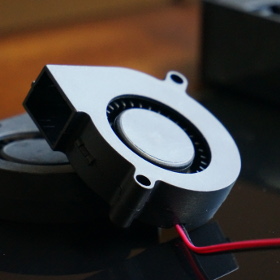 Fans Two mini 5v blower fans |
 Jumper Wires Used to connect the sensors to the GPIO |
Parts Two 2N222 Transistors & two 10k Resistors |
|
Installing & Configuring Fans In this build we have two small 5v blower fans used to regulate humidity in each vivarium The 5 volt fans were chosen because the Raspberry Pi can supply 5 volts. You can easily add your own power supply for higher power fans. |
|||
|
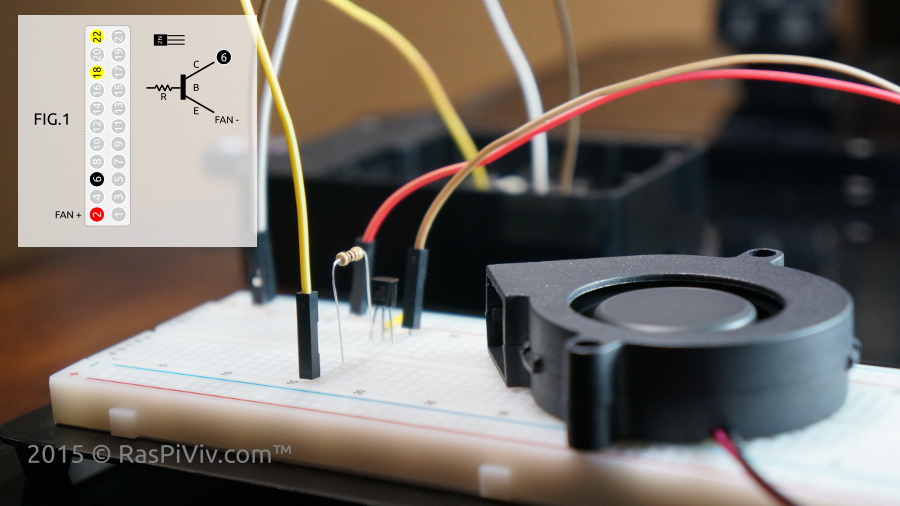
Connect the positive fan wires to 5 volt pint Connect the negative fan wires to E (Emitters) of the transistors Ground both C (collectors) of the transistors Connect GPIO 5 & 6 (physical pins 18 & 22) to B (Base) of the transistors with a 10K resistor |
|||
 |
|||
|
Open a browser and visit your Raspberry Pi Vivarium Controller "manual Controls" page and test your fans NOTE: Buttons will show what will happen when clicked, not the current state of the device. |
|||
 |
|||
|
STEP 3 Set the Fan's humidity threshold sudo nano /var/www/html/fanh1.php Edit the threshold of your desired value Repeast for fan #2 sudo nano /var/www/html/fanh2.php 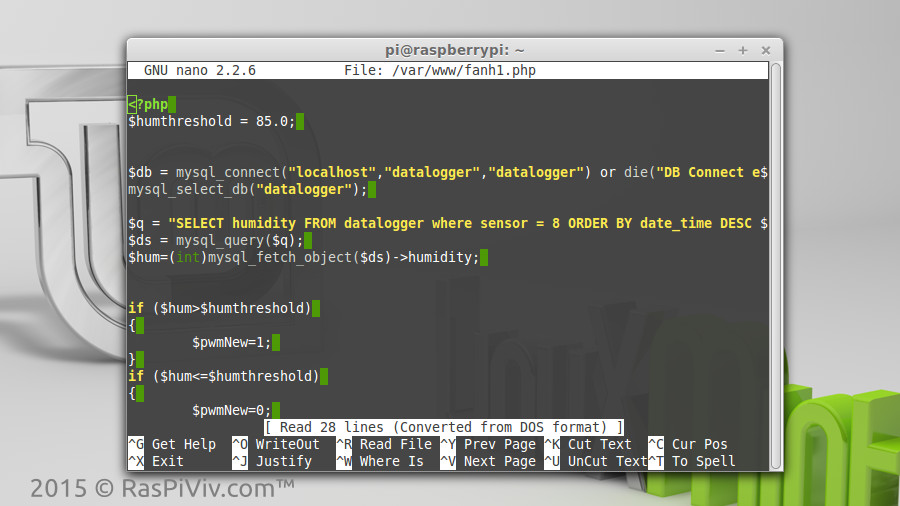 | |||
|
STEP 4 Create a cron job to regulate humidity * /5 * * * * php /var/www/html/fanh1.php * /5 * * * * php /var/www/html/fanh2.php 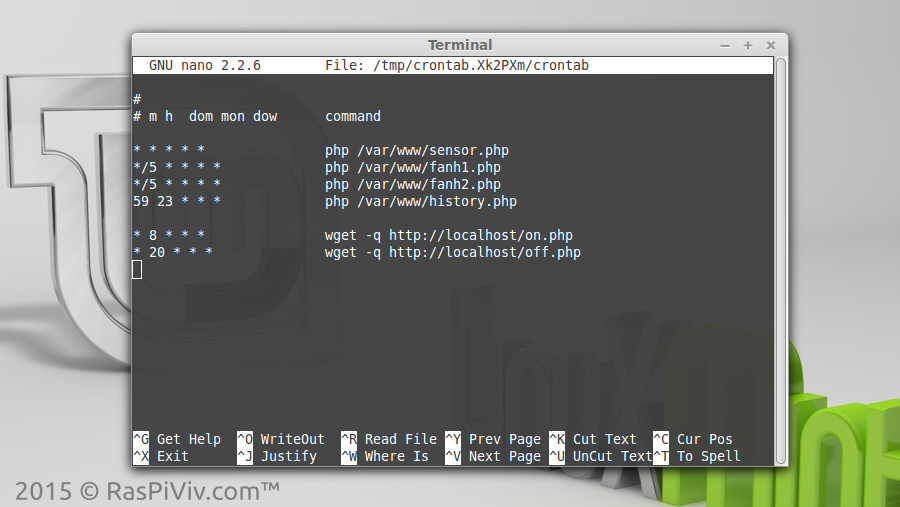 | |||
|
FINISHED The Raspberry Pi Vivarium Controller will check the humidity readings every 5 minutes and authomatically turn on the fans if the humidity is above your threshold Your may use the same method to control other vivarium components such as heaters, misting and lighting. 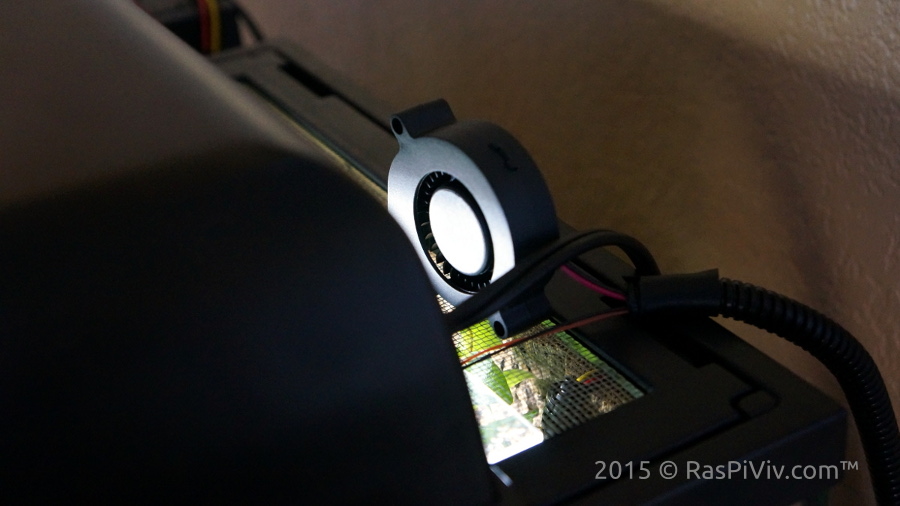 | |||